By: Team UnrealUnity Since: Sep 2019 Licence: MIT
- 1. Introduction
- 2. Quick Start
- 3. Features
- 4. FAQ
- 5. Command Summary
1. Introduction
Welcome to the VISIT User Guide!
VISIT is a desktop address book application for Doctors to plan their visits and manage their patient information. Most notably, VISIT is optimized for Doctors who prefer to use a Command Line Interface (CLI) while still having a pleasant Graphical User Interface (GUI). If your typing speed is sufficiently quick, VISIT can greatly increase your efficiency in managing your patient profiles and appointments.
This user guide provides in-depth documentation on how to use quickly get up to speed on using VISIT. Interested in spending less time resolving logistical hiccups and more time doing your job? Jump to the Section 2, “Quick Start” to get started. Enjoy!
2. Quick Start
-
Ensure you have Java
11or above installed in your Computer. -
Download the latest
VISITapp.jarhere. -
Copy the file to the folder you want to use as the home folder for VISIT.
-
Double-click the file to start the app. The GUI should appear in a few seconds.
-
Type the command in the command box and press Enter to execute it.
e.g. typinghelpand pressing Enter will open the help window. -
Some example commands you can try:
-
list: lists all patients -
addn/John Doe p/98765432 e/johnd@example.com a/John street, block 123, #01-01: adds a patient namedJohn Doeto VISIT’s address book. -
delete3: deletes the 3rd contact shown in the current list -
exit: exits the app
-
-
Refer to Section 3, “Features” for details of each command.
3. Features
Using Commands in this Guide
-
All commands listed are case-insensitive.
-
Words in
UPPER_CASErepresent the parameters to be specified. Parameter headers are required to be in lower-case.
e.g. inadd n/NAME,NAMEis a parameter which can be used asadd n/John Doe. -
Items in square brackets are optional.
e.gn/NAME [t/TAG]can be used asn/John Doe t/coughor asn/John Doe. -
Items with
… after them can be used optionally or multiple times.
e.g.[t/TAG]…can be used ast/cancer,t/pneumonia t/h1n1etc. -
Parameters can be in any order if suffixes like "n/" or "p/" are specified.
e.g. if the command specifiesn/NAME p/PHONE_NUMBER,p/PHONE_NUMBER n/NAMEis also acceptable.
3.1. Application Commands
3.1.1. Viewing help : help
Shows a quick list of user commands. A link to this User Guide is also provided for the full overview of commands.
Format: help
3.1.2. Exiting the program : exit
Exits the program.
Format: exit
3.2. Viewing and Managing Patients
VISIT can store all the patient information for doctors for easy access. The following commands enable doctors to be able to add patients and their relevant particulars to be tracked by VISIT, and also view a list of patients that have been entered.
3.2.1. Listing all patients : list
Shows a list of all patients in the Patients dashboard. Used after a search function to return back to the full list.
Format: list
3.2.2. Adding a patient : add
Adds a patient to the Patients list.
Format: add n/NAME p/PHONE_NUMBER e/EMAIL a/ADDRESS [t/TAG]…
| A patient can have any number of tags (including 0). Tags will be appear in lowercase and ignore duplicates. |
Examples:
-
add n/John Doe p/98765432 e/johnd@example.com a/John street, block 123, #01-01 -
add n/Betsy Crowe t/cold e/betsycrowe@example.com a/Changi Hospital p/1234567 t/pneumonia
3.2.3. Editing a patient’s particulars : edit
Edits an existing patient in the Patients list.
Format: edit INDEX [n/NAME] [p/PHONE] [e/EMAIL] [a/ADDRESS] [t/TAG]…
Examples:
-
edit 1 p/91234567 e/johndoe@example.com
Edits the phone number and email address of the 1st patient to be91234567andjohndoe@example.comrespectively. -
edit 2 n/Betsy Crower t/
Edits the name of the 2nd patient to beBetsy Crowerand clears all existing tags.
3.2.4. Locating patient by name : find
Finds patients whose names contain the queried KEYWORD.
Format: find KEYWORD
Examples:
-
find John
ReturnsjohnandJohn Doe -
find ans
ReturnsHansandAziz Ansari
3.2.5. Deleting a patient : delete
Deletes the specified patient from the Patients list.
Format: delete INDEX
Examples:
-
list
delete 2
Deletes the 2nd patient in the list. -
find Betsy
delete 1
Deletes the 1st patient in the results of thefindcommand.
3.2.6. Clearing all patient data : clear
Clears all entries from the Patients list.
Format: clear
| Be careful when entering this, as this will erase all patient data from VISIT! |
3.3. Viewing and Generating a Patient’s Profile
VISIT allows you to visualize a specified patient’s full details on an easy to access panel. The command can be initiated as follows:
Format: profile INDEX
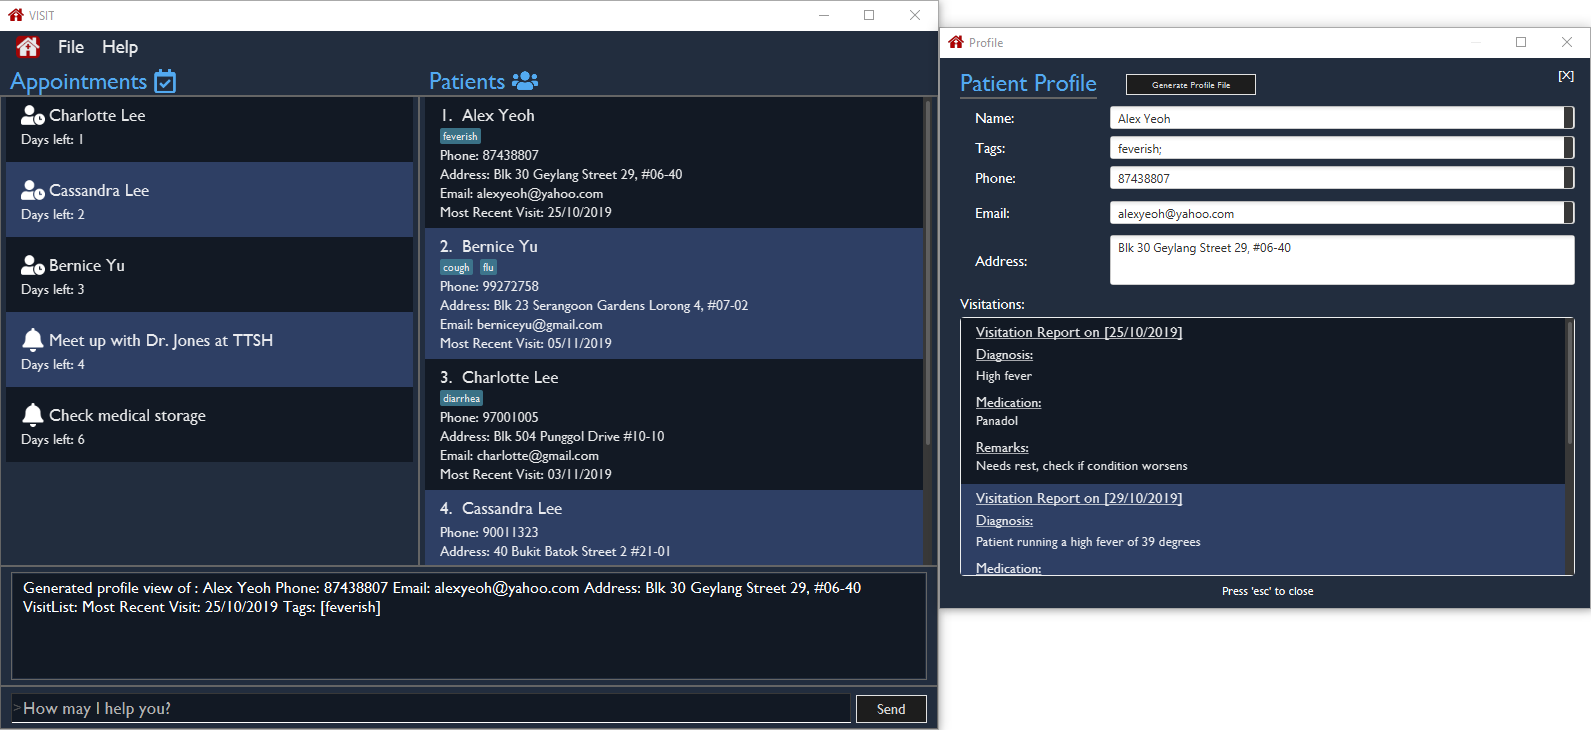
3.3.1. Opening a Profile Window: : profile
Step 1: Enter in profile 1 into the command bar and press Enter.

Step 2: A pop out panel will appear, detailing the various attributes of the specified Patient.
This window includes all Patient attributes and visitation records.
| You must close this window before doing anything else with VISIT (Adding Visits, Deleting Patients, etc.). |
Closing the panel
Clicking on the cross on the top-right of the panel or pressing esc button on your keyboard will close the panel.
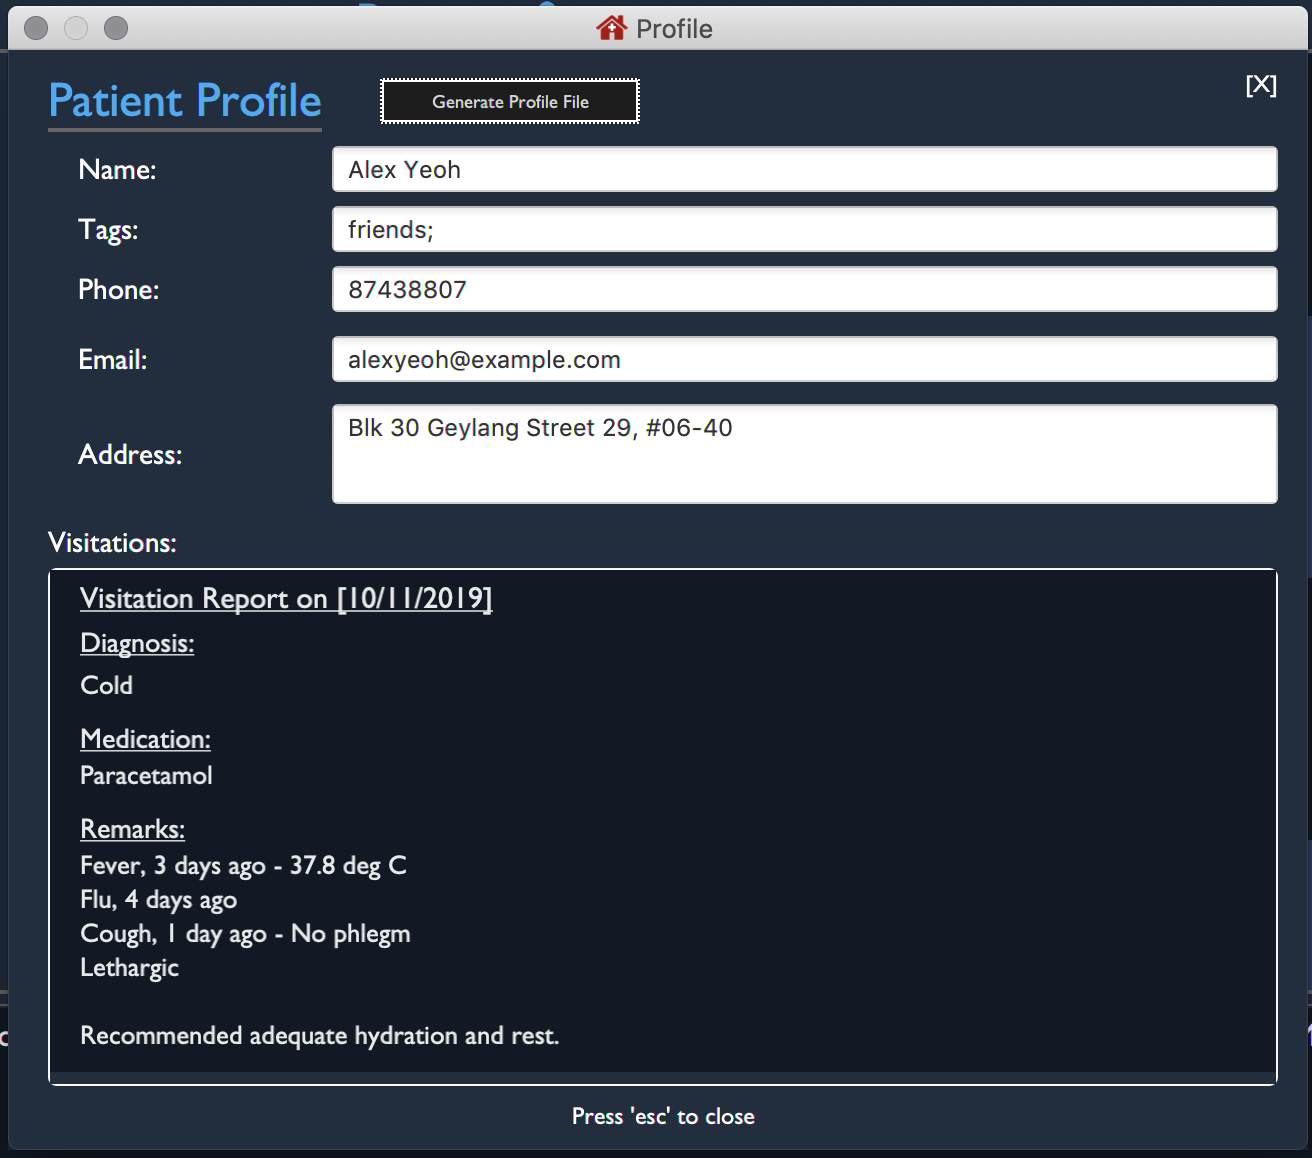
3.3.2. Generating and Exporting a Profile as a .txt file
You can generate a text file containing the contents of the Patient’s Profile, for your own archiving purposes and exporting.
Step 1: Press p on your keyboard or click the Generate Profile File button.
| You will see a message saying "Profile .txt created in /generated_profiles/." once the Profile has been successfully generated. |
Step 2: Navigate to the generated_profiles folder located in the parent folder of VISITapp.jar

Step 3: Access the generated profile stored in the folder.

| The generated text file will be the following format: Name_Contact Number_Date Time.txt e.g. Alex Yeoh_87438807_02-11-2019 20-33-58.txt |
Below is an example of a generated profile .txt file:
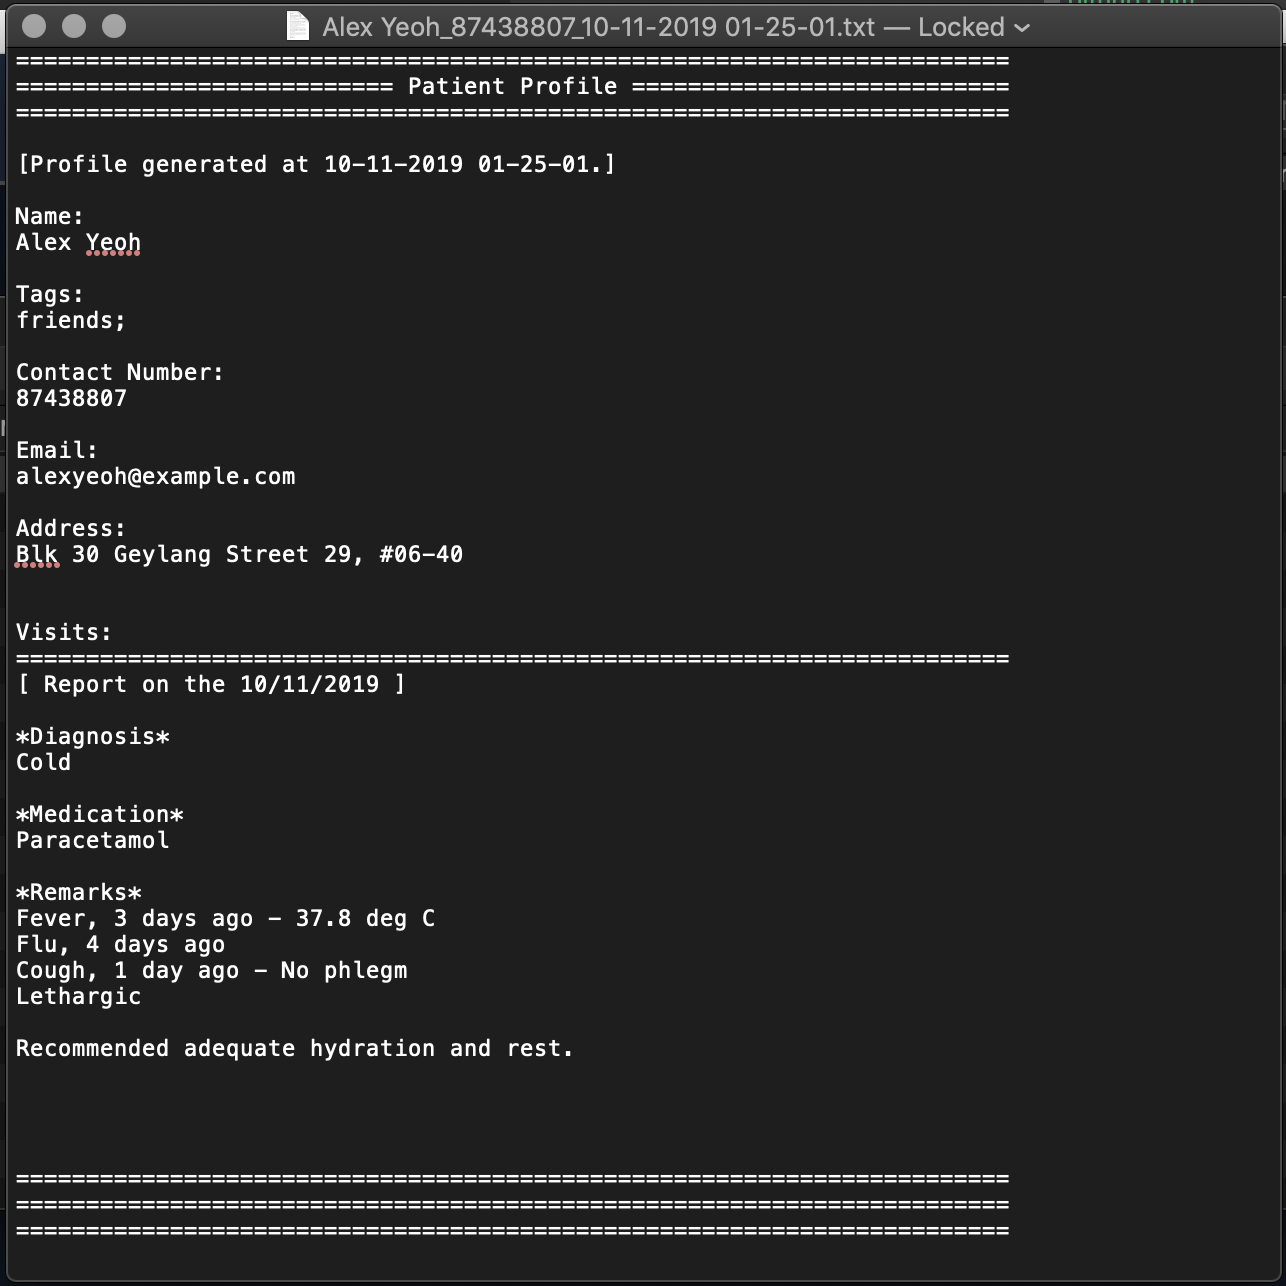
| While files are write-protected, you can still create duplicate copies for editing. Data encryption and safer data handling is planned for VISIT v2.0 (See Section 3.8, “Upcoming Features”). |
3.4. Viewing and Managing Visits
VISIT enables doctors to also track the visitations for each patient, allowing the specification of diagnosis, medications prescribed as well as other general comments per visit.
3.4.1. Adding a new visitation report for a patient : addvisit
Opens a pop-up panel that enables the specification of a new visitation report for a particular patient.
Format: addvisit INDEX [v/DATE]
Example:
Let’s say that you have just gotten a patient’s folder of past visits and you want to record a house call made on 3rd January 2019. The patient is 1st in the list.
To enter the details of the report into VISIT:
-
Type
addvisit 1 v/03/01/2019into the command box and press Enter to execute it.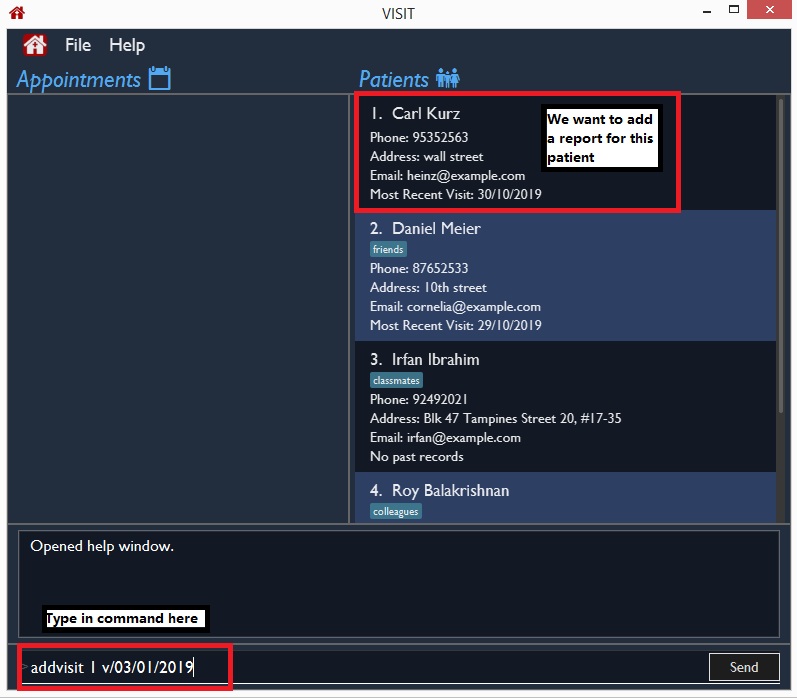
-
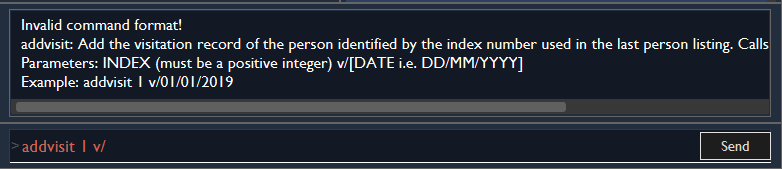
Date must be in the "dd/MM/yyyy" format (e.g.
v/19/10/2019). The valid range of dates starts from the year 1900 and ends at year 2999 (inclusive).If no date is specified and the command is used without the prefix 'v/' (for example addvisit 1), the report will default to the current local date of the computer.
-
-
Key in the details in the respective fields of the pop-up form that appears.
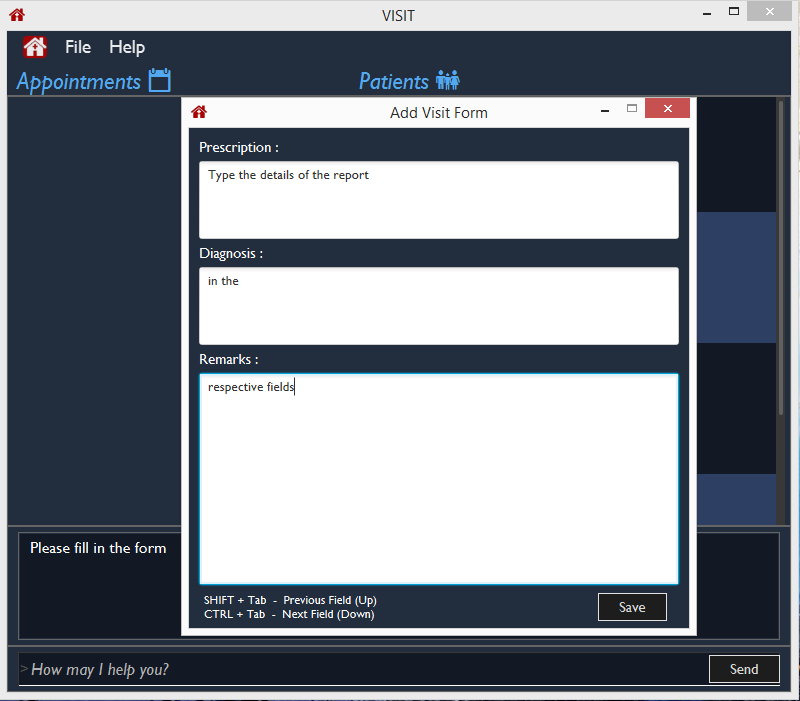
-
Press CTRL + Tab to navigate to the next field (down)
-
Press SHIFT + Tab to navigate to the previous field (up)
-
-
Click the Save button or press F2 to save your entry.
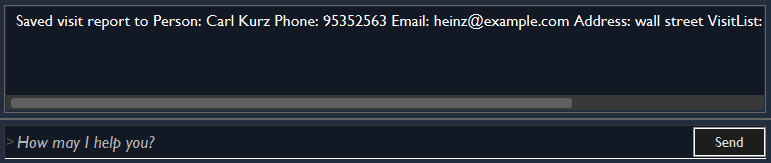
-
The pop-up form closes and the display box will display a message indicating a successful entry.
While addvisit 1is valid, typing inaddvisit 1 v/without a valid date will give an error.
3.4.2. Editing the particulars of a visitation report : editvisit
Opens a pop-up panel that enables the editing of an existing visitation report of a particular patient.
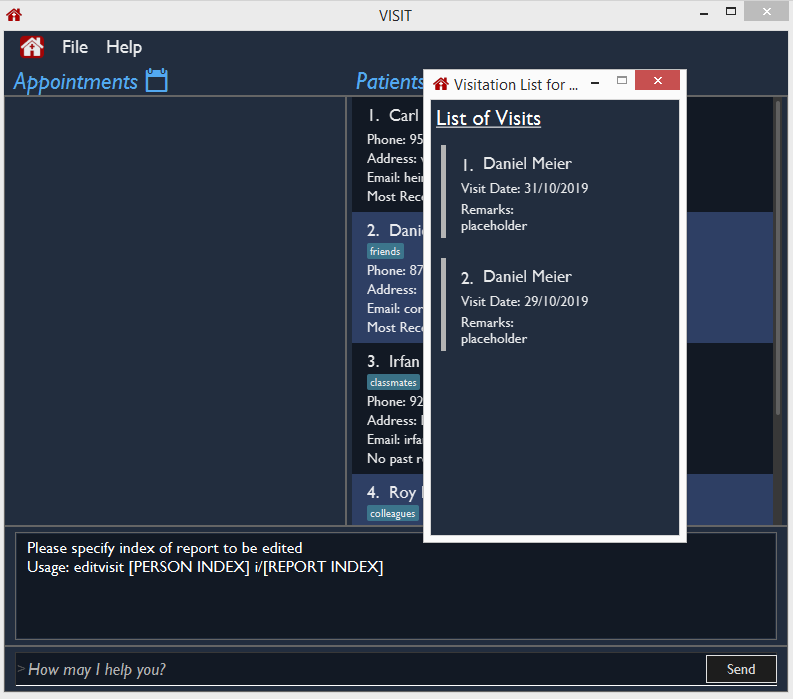
Format: editvisit INDEX [i/REPORT_INDEX]
If no report index is specified, editvisit INDEX or editvisit INDEX i/ will open a panel showing the reports of that patient and the relevant indexes of the reports. To edit the visit report, simply re-enter the command with the desired report index.
|
Example:
Let’s say you want to edit the 2nd visit report of a patient and the patient is the 3rd name in the list.
-
Type
editvisit 3 i/2into the command box and press Enter to execute it.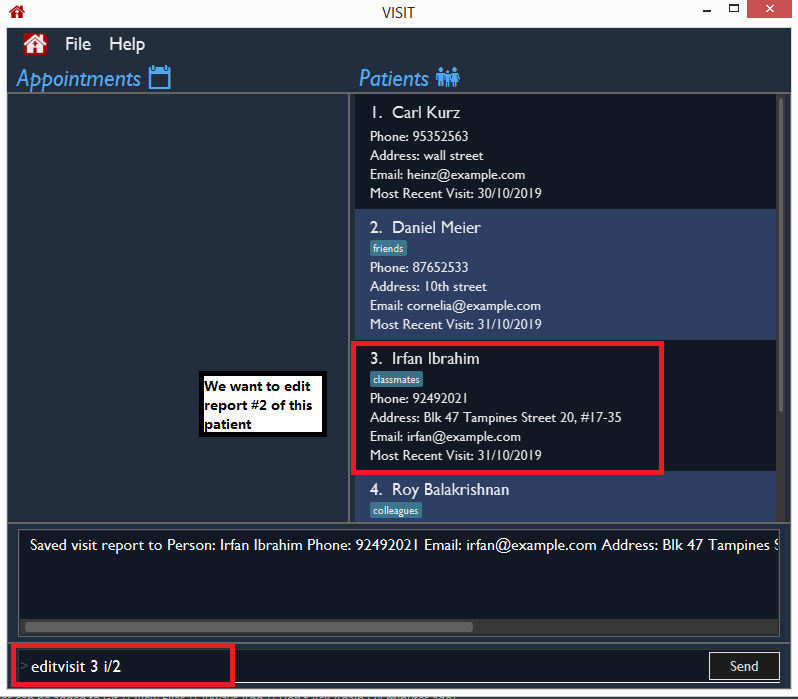
-
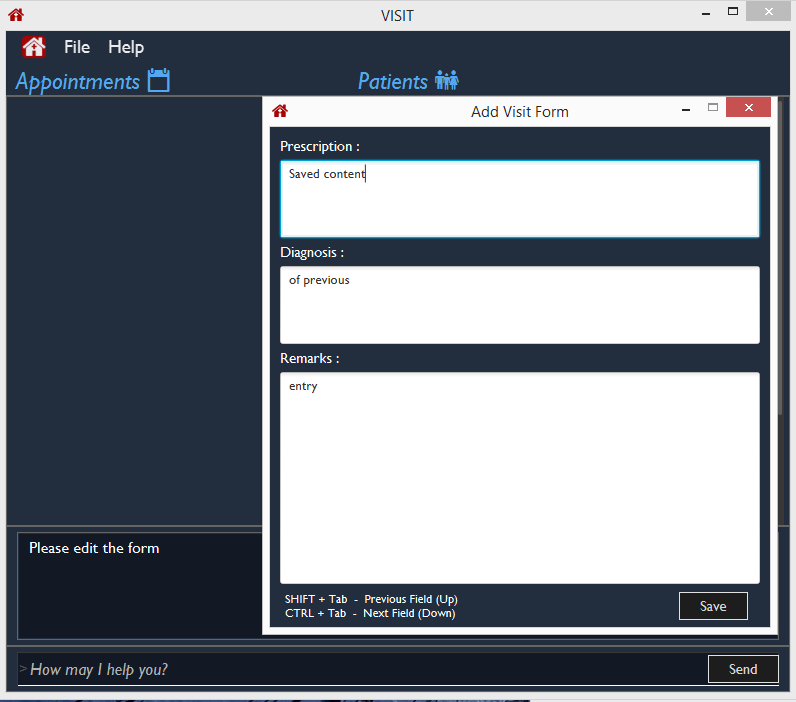
Key in the details in the respective fields of the pop-up form(which is pre-filled with the existing information of the report) that appears.
-
Press CTRL + Tab to navigate to the next field (down)
-
Press SHIFT + Tab to navigate to the previous field (up)
-
-
Click the Save button or press F2 to save your edits.
-
The pop-up form closes and the display box will display a message indicating a successful entry.
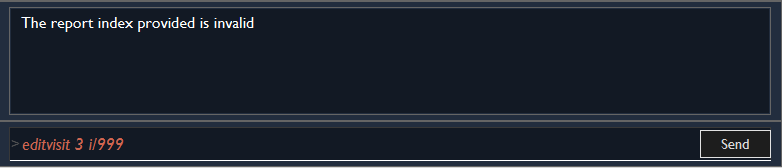
| An error will be thrown if the report with the given report index does not exist or the index given is not a number. |
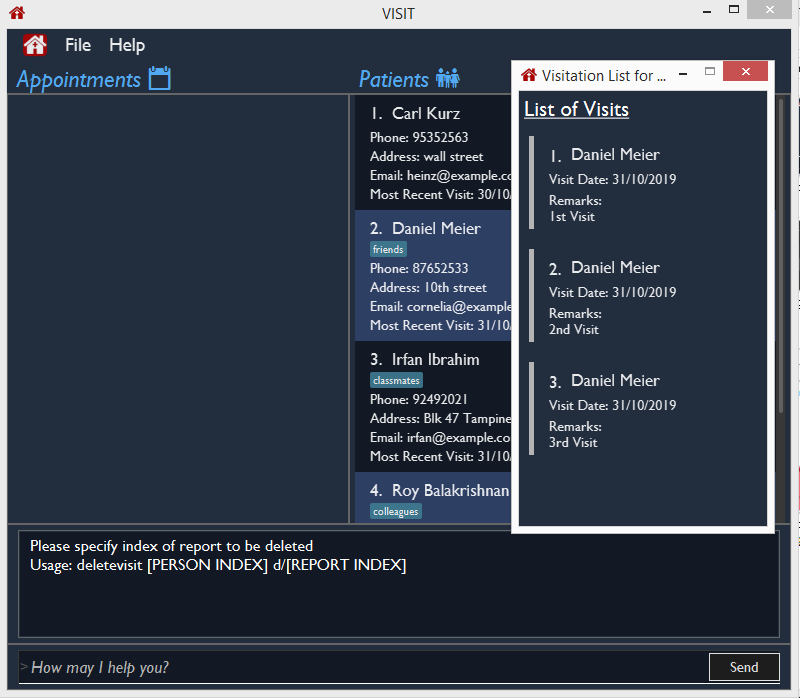
3.4.3. Deleting a visitation report : deletevisit
Deletes the specified visitation report.
Format: deletevisit INDEX [d/REPORT_INDEX]
If no report index is specified, deletevisit INDEX or deletevisit INDEX d/ will open a panel showing the reports of that patient and their relevant indexes of the reports. To delete the visit, simply re-enter the command with the desired report index.
|
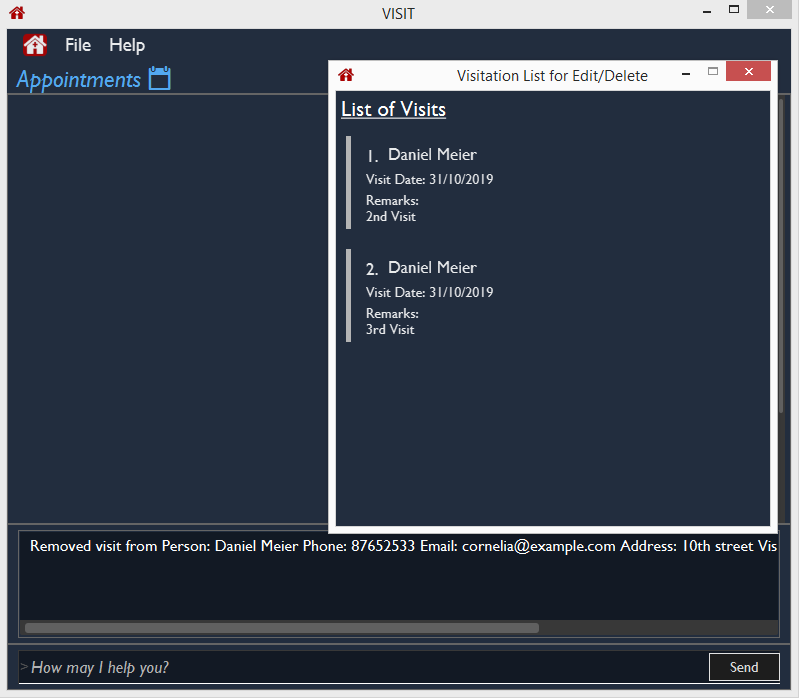
Example:
Let’s say you want to delete the 1st visit report of a patient and the patient is the 2nd name in the list.
-
Type
deletevisit 2 d/1into the command box and press Enter to execute it.
-
A panel showing the list of reports will be shown, now without the deleted report and the display box will display a message indicating a successful deletion.
| An error will be thrown if the report with the given report index does not exist or the index given is not a number. |
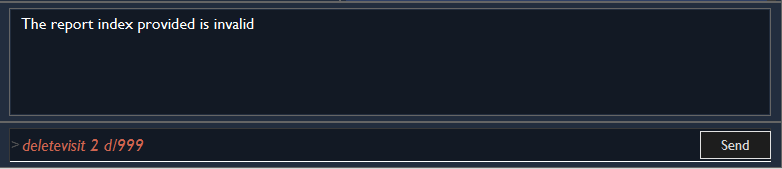
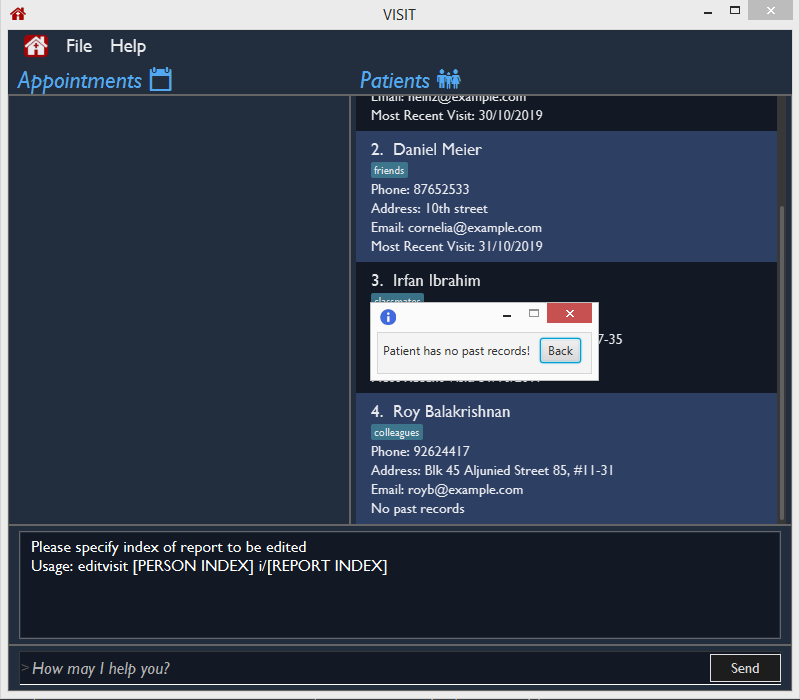
For both deletevisit and editvisit commands if the patient has no past records, a pop up with the message "Patient has no past records" will be shown instead of a list of reports when editvisit [INDEX] or deletevisit [INDEX] is run. Note that an error will be raised if the report index is provided to a patient with no past records, for example editvisit [INDEX] i/1 or deletevisit [INDEX] d/1.
3.5. Appointment System
VISIT also enables doctors to keep abreast and up-to-date on any events or deadlines as VISIT can be customized to remind them of any follow-up visits or other timed reminders.
There are two kinds of Appointments: Follow-Ups and Reminders.
You can only have one active Appointment of the same title, adding the same Appointment with a different day count will simply update the existing Appointment.
Follow-ups in this version do not update if you change the name of the patient after the follow-up is created.
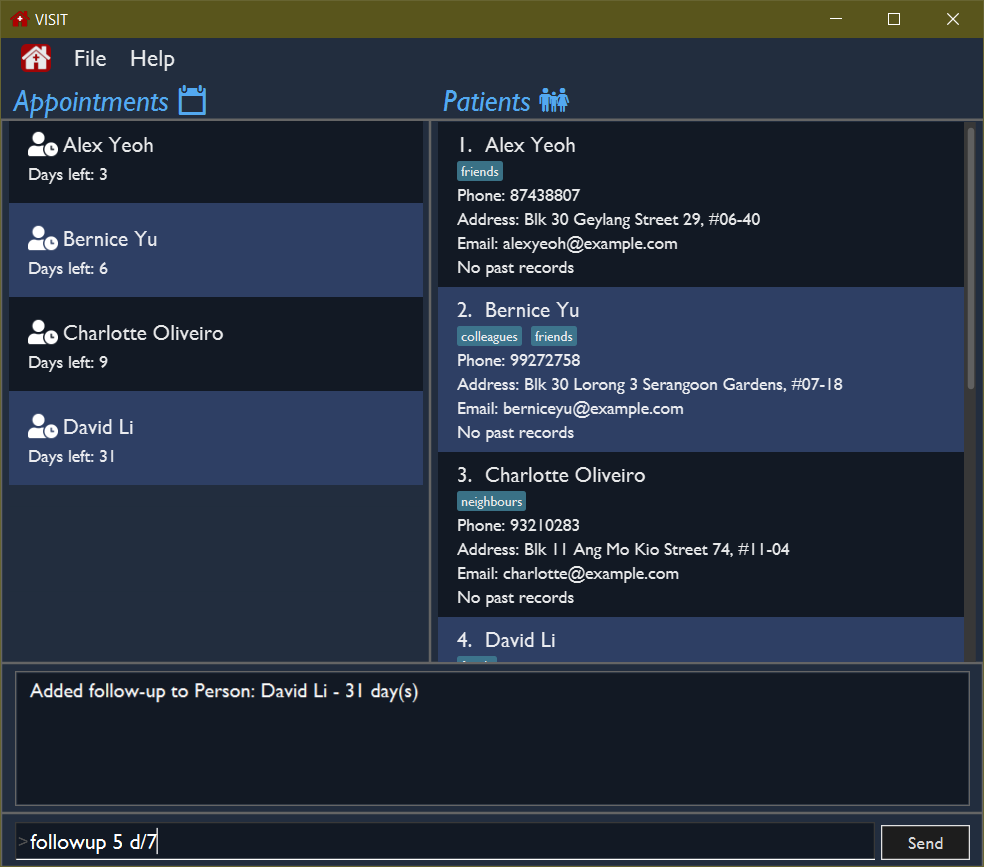
3.5.1. Adding a follow-up visit with patient : followup
Adds a follow-up visit for a particular patient. You can add one even if you have never had a visit with the patient in the past. The application will keep track of when your next appointment with the patient is on the Appointments window.
Format: followup INDEX [d/DAYS]
| The follow-up entry will by default generate the follow-up for 7 days' time if not specified. |
Examples:
-
followup 9 d/10
Creates a follow-up entry on patient with index 9 for 10 days later. -
followup 1
Creates a follow-up entry on patient with index 1 for 7 days later.
3.5.2. Creating a generic reminder : reminder
Creates a new reminder to show up in the Appointments window.
Format: reminder TEXT [d/DAYS]
| The reminder entry will by default generate the prompt for 7 days' time if not specified. |
Examples:
-
reminder Two Point Hospital closed d/10
Creates a reminder "Two Point Hospital closed" that will display for the next 10 days. -
reminder Losartan recall
Creates a reminder "Losartan recall" that will display for the next 7 days.

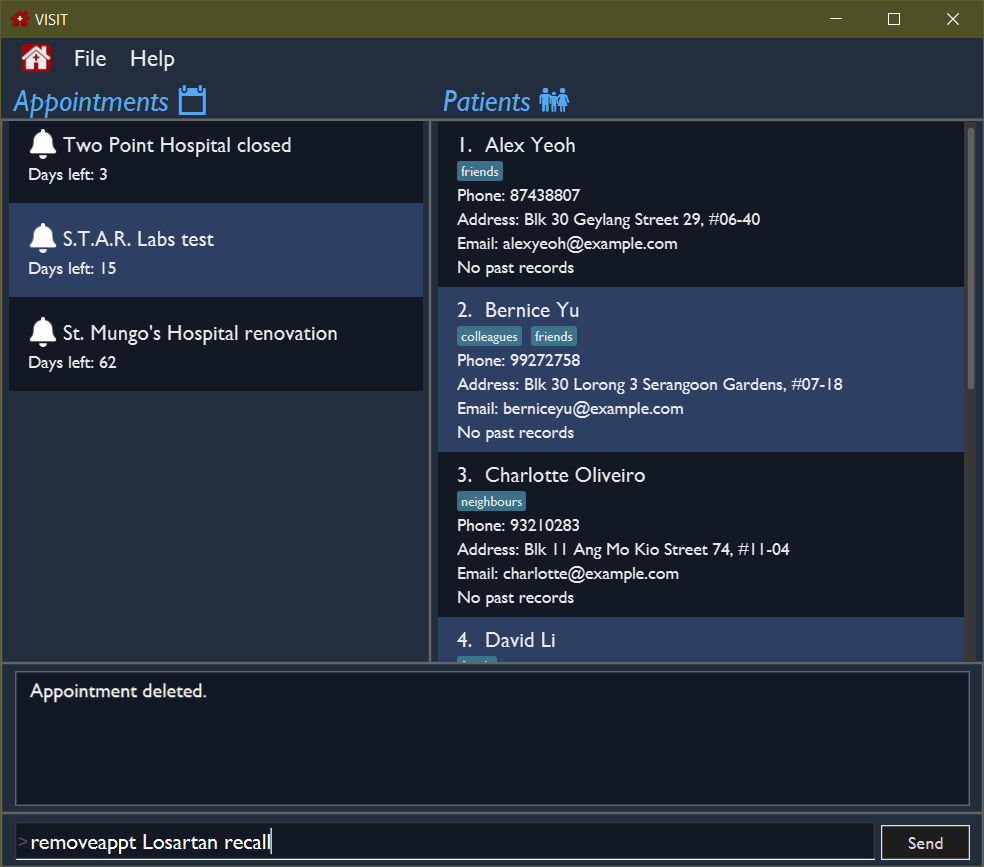
3.5.3. Removing an Appointment : removeappt
Remove an appointment from VISIT. This can be either a Follow-up or Reminder.
Format: removeappt DESCRIPTION [d/DAYS]
| Any appointment matching just the description will be removed if the specific days is not specified. |
Examples:
-
removeappt Two Point Hospital closed
Removes any appointment which description is "Two Point Hospital closed". -
removeappt Satya Nadella
Removes any appointments with the patient whose name is Satya Nadella.
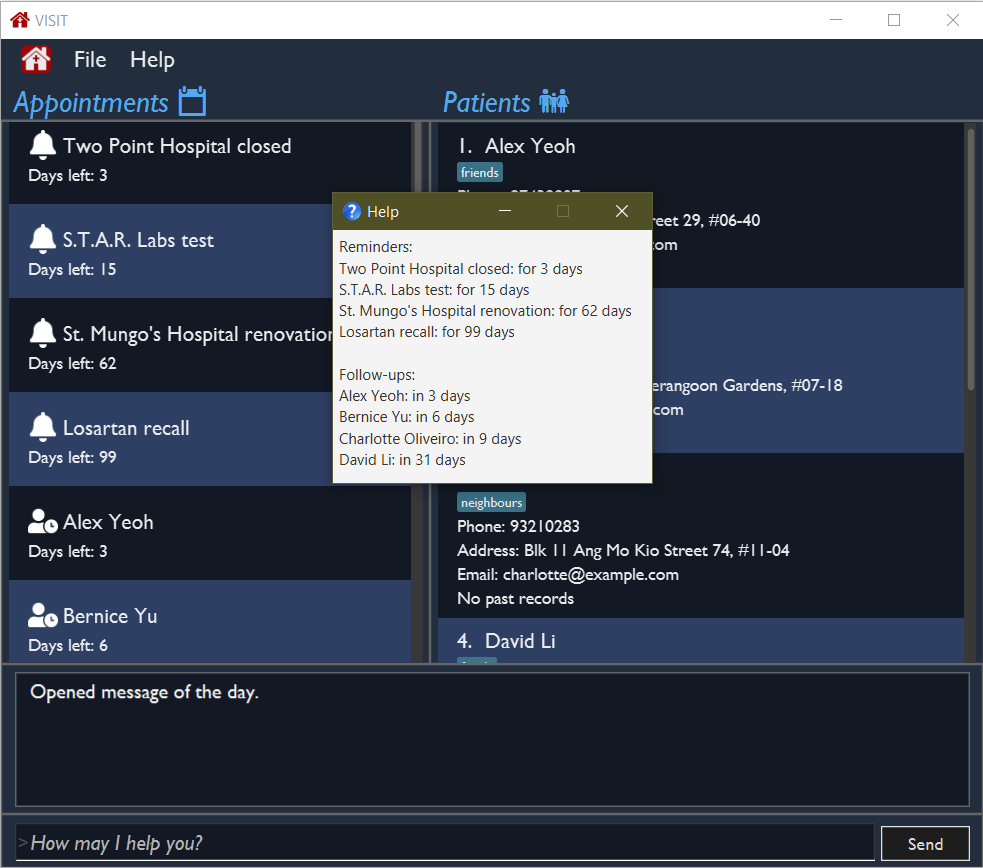
3.5.4. Show Appointments "Message of the Day" box : show
Shows a pop-up containing the appointments. This is useful if you want to keep a small window just containing the appointments on the screen, separate from the main window.
Format: show
3.5.5. Sort Appointments : sort
Sorts the appointments in order of type, days remaining, and finally by name.
Format: sort
3.6. Optimization for Command-Line Interface (CLI) Users
VISIT being an application optimized for doctors who are comfortable with CLI, has support for features such as aliasing for commands to enable command entries which are often used to be stored and used quickly and easily.
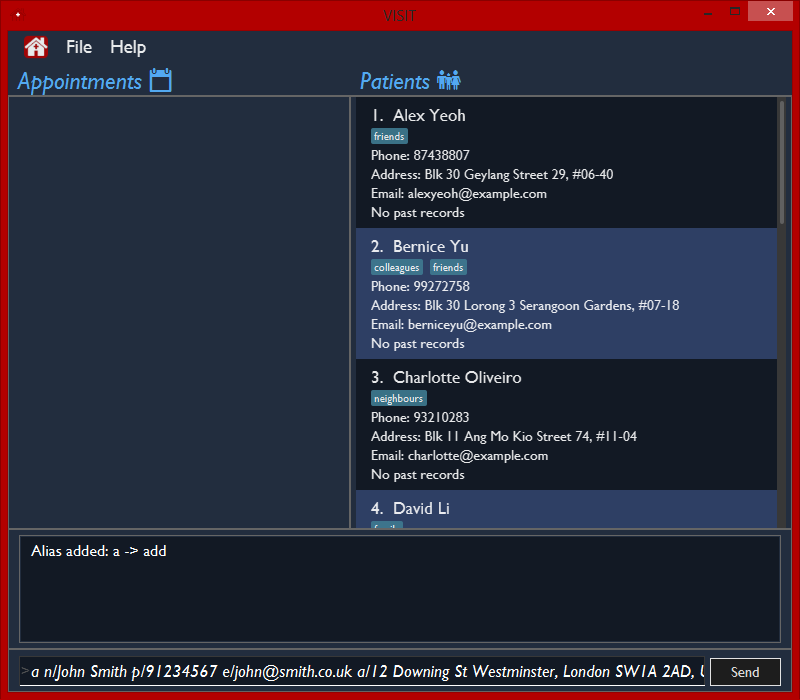
3.6.1. Setting a shorthand command / alias : alias
Set an alias for a command to enable faster command entry for a customized input. This command will override your previous mapping for the alias if there exists a prior mapping. Additionally, using existing commands as aliases is disallowed.
Format: alias l/SHORTHAND v/COMMAND
Examples:
-
alias l/ls v/list
Typinglsnow works equivalently as typinglist. -
alias l/display all patients v/list
Typingdisplay all patientsnow works equivalently as typinglist.
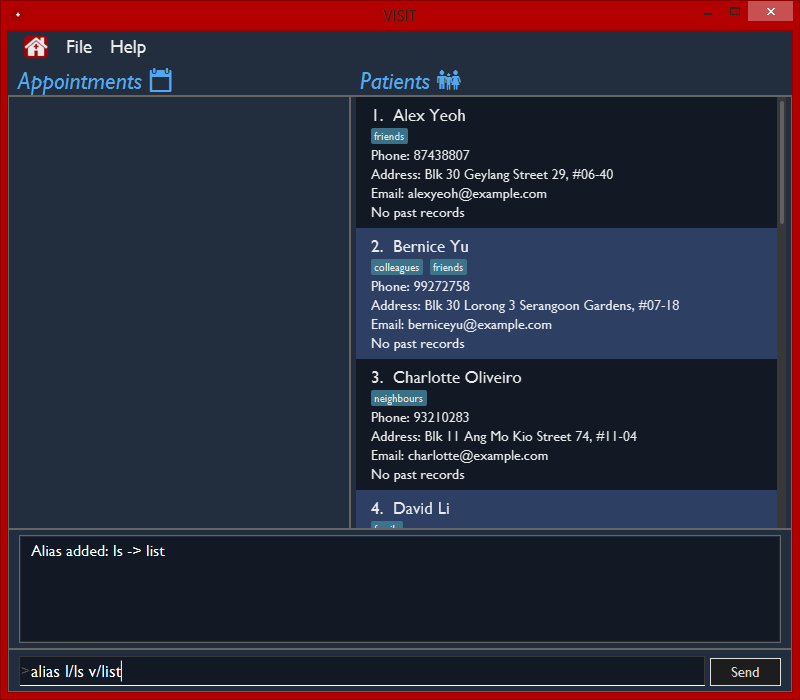
The alias command will override any previous alias mapping if any.All your aliases are saved across multiple sessions and are persistent until removed. |
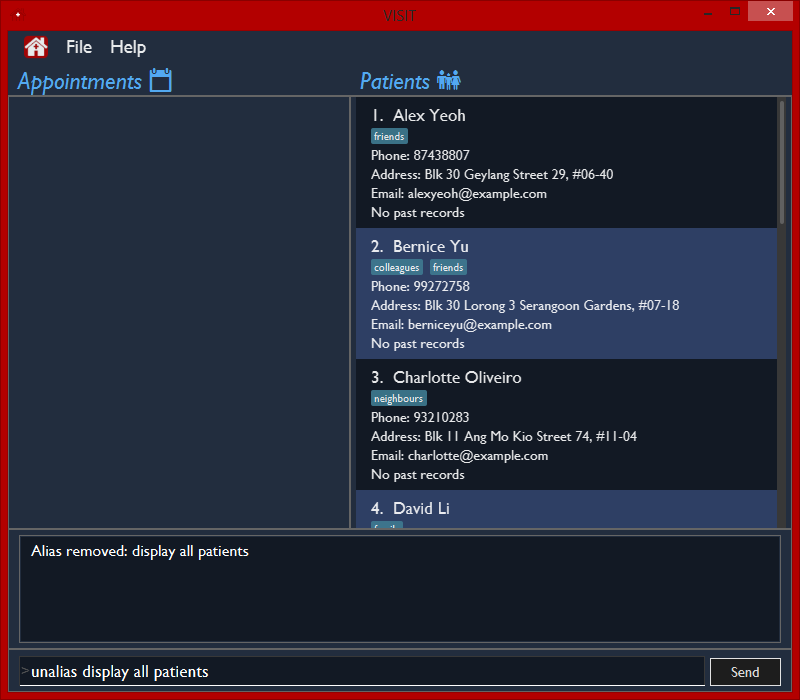
3.6.2. Removing a shorthand command / alias : unalias
Delete an existing alias, if it exists.
Format: unalias SHORTHAND
Examples:
-
unalias ls
Typinglswill no longer be equivalent to typinglist.
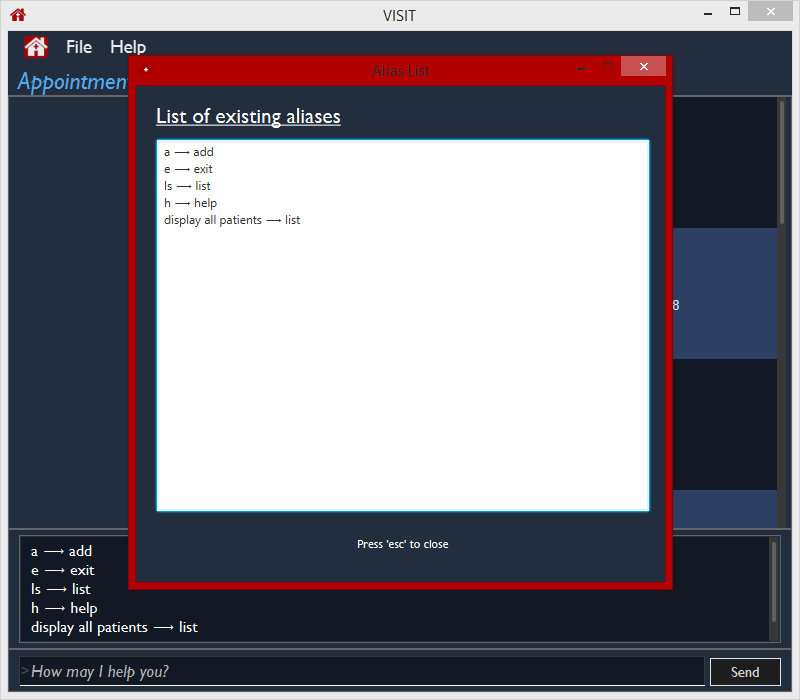
3.6.3. Showing all existing shorthand commands / aliases : aliaslist
Show all existing aliases.
Format: aliaslist
Examples:
-
aliaslist
Shows all the existing aliases.
3.6.4. Using aliases
To use a user-defined alias, you just have to type the alias you defined. Additional optional parameters can also be specified if the aliased command takes in additional arguments.
Format: SHORTHAND [additional arguments]
Examples:
| Matching of aliases uses the longest substring match. (i.e. if there exists an alias follow 7 and follow, typing follow 7 will always match with follow 7 instead of follow.) |
3.7. Saving the data
VISIT’s address book data are saved in the hard disk automatically after any command that changes the data.
There is no need to save manually.
3.8. Upcoming Features
The following features are intended for a later release of VISIT that will further expand on the managing power doctors will be able to execute using the application.
3.8.1. Inventory System [Coming in v2.0]
VISIT v2.0 will include an inventory system for doctors to manage and organise their medical stores.
Doctors will be able to generate the list of medication in their stock and assign them to patients using the app
, which automatically deducts from that list.
Warnings of low stocks are also an intended feature.
3.8.2. Profile Data Encryption and .pdf exporting [Coming in v2.0]
In v2.0, VISIT will allow you to export Patient data from VISIT with greater assurances on confidentiality with .pdf exporting, enabling password encryption for exported Profiles.
3.8.3. Generating of Medical Certificates [Coming in v2.0]
In v2.0, VISIT will allow you to easily generate an official Medical Certificate with a single command.
3.8.4. Microsoft Azure Integration [Coming in v2.0]
Microsoft Azure is a popular Cloud Computing platform that allows for data analysis, remote deployment and user authentication resources. We plan to leverage this power in VISIT v2.0 so that you may securely access VISIT from any location, truly bringing VISIT on-the-go.
3.8.5. Improved UI [Coming in v2.0]
With more features being added in v2.0, the UI will be reworked to allow new and old features to have great accessibility and usability. The new UI will utilise a dashboard system so that Doctors are able to view more information as we scale up VISIT’s functionality. Each tab in the dashboard will represent a feature, i.e. The Appointment list will be a tab containing a Calendar view that tracks reminders and followups by the date and time, with a pop up notification on launch and near deadlines.
4. FAQ
Q: How do I transfer my saved patient and visit data to another Computer?
A: Install VISIT in the other computer, run it once, typing exit to exit the application. Next, overwrite the generated data folder created with the data folder of your previous installation folder for VISIT.
Q: How do I transfer my shorthand command data to another Computer?
A: Install VISIT in the other computer and copy the preferences.json file from the previous installation folder for VISIT into the installation folder on the new computer.
5. Command Summary
5.1. Application Commands
-
Viewing help :
help -
Exiting the program :
exit
5.2. Viewing and Managing Patients
-
Listing all patients :
list -
Adding a patient :
add n/NAME p/PHONE_NUMBER e/EMAIL a/ADDRESS [t/TAG]…
e.g.add n/Betsy Crowe t/cold e/betsycrowe@example.com a/Changi Hospital p/1234567 t/pneumonia -
Editing a patient’s particulars :
edit INDEX [n/NAME] [p/PHONE] [e/EMAIL] [a/ADDRESS] [t/TAG]…
e.g.edit 2 n/Betsy Crower t/ -
Locating patient by name :
find KEYWORD [MORE_KEYWORDS]
e.g.find Betsy Tim John -
Deleting a patient :
delete INDEX
e.g.delete 2 -
Clearing all patient data :
clear
5.3. Viewing and Generating a Patient’s Profile
-
Viewing and generating a Full Profile :
profile INDEX
e.g.profile 1
5.4. Viewing and Managing Visits
-
Adding a new visitation report for a patient :
addvisit INDEX [v/DATE]
e.g.addvisit 1 v/19/10/2019 -
Editing the particulars of a visitation report :
editvisit INDEX [i/REPORT_INDEX]
e.g.editvisit 1 i/1 -
Deleting a visitation report :
deletevisit INDEX [d/REPORT_INDEX]
e.g.deletevisit 1 d/1
5.5. Appointment System
-
Adding a follow-up reminder with patient :
followup INDEX [d/DAYS]
e.g.followup 9 d/10 -
Creating a generic reminder :
reminder TEXT [d/DAYS]
e.g.reminder Two Point Hospital closed d/10 -
Removing an Appointment :
removeappt DESCRIPTION [d/DAYS]
e.g.removeappt Two Point Hospital closed -
Show Appointments "Message of the Day" box :
show -
Sort Appointments :
sort
5.6. Optimization for Command-Line Interface (CLI) Users
-
Setting a shorthand command / alias :
alias l/SHORTHAND v/COMMAND
e.g.alias l/display all patients v/list -
Removing a shorthand command / alias :
unalias SHORTHAND
e.g.unalias display all patients -
Showing all existing shorthand commands / aliases :
aliaslist